Solo Backpacking Australia: The Complete Route & Planning Guide
Why Australia Is a Top Destination for Solo Backpackers
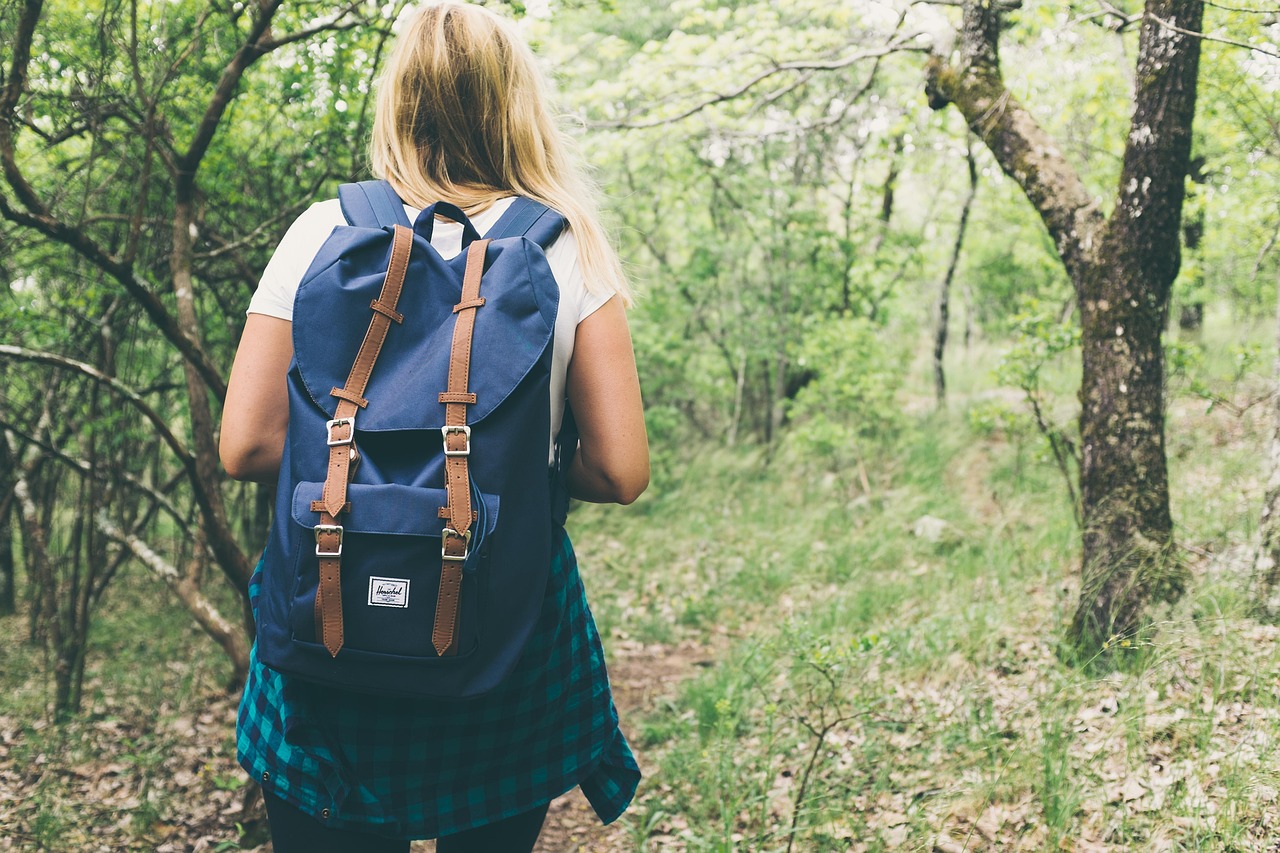
Australia has a well-earned reputation as a rite of passage for solo backpackers. It’s not just the iconic landscapes or the wildlife. The infrastructure here is genuinely built for independent travel. Hostels are abundant, safe, and social. The backpacker bus network covers the major routes. And the working holiday visa makes it feasible to stay for a year and actually fund your trip while you go.
What really sets Australia apart is the ease of meeting people. Solo travel here rarely feels lonely. Hostels have communal kitchens, organised pub crawls, and group tours designed for people travelling alone. You'll meet travellers from all over the world, many of whom are also on their first solo trip. The culture is casual and welcoming. It’s a place where asking someone at reception if they know a good spot for dinner can lead to a week of travelling together.
There are practical advantages too. English is the primary language. Currency is stable. Healthcare is reliable. Emergency services are accessible even in remote areas. That doesn’t mean Australia is risk-free, but for a first-time solo backpacker, it’s about as forgiving as a long-haul trip gets. You can focus on the experience rather than worrying about logistics.

The Big Three: Choosing Australia’s Best Backpacking Route for You
Australia is massive. You cannot see it all in one trip unless you have six months and a willingness to live on buses. Most solo backpackers choose one primary route and then add a side trip if time permits. The three most popular routes are the East Coast, the West Coast, and the Red Centre Outback. Each offers a completely different experience.
The East Coast (Sydney to Cairns)
This is the classic. It’s the most popular route for good reason. It has the highest density of hostels, the most organised tours, and the easiest transport links. The vibe is very social. You’ll find party hostels in Byron Bay and Airlie Beach, but also quieter spots in the Daintree Rainforest. Duration: 3 to 6 weeks for a comfortable pace. Best for: first-time solo backpackers, anyone wanting a social scene, and travellers on a mid-range budget.
The West Coast (Perth to Broome)
This route is more rugged and far less crowded. Distances are vast, public transport is sparse, and you will likely need to rent a campervan or join a group tour. The payoff is stunning isolation: empty beaches, Ningaloo Reef (where you can swim with whale sharks), and national parks like Karijini. Duration: 2 to 4 weeks for a rushed version, 6 weeks for a proper trip. Best for: travellers who want to get off the beaten path, enjoy driving, and can handle a bit more planning.
The Red Centre (Alice Springs to Uluru)
This is a shorter but uniquely Australian experience. You’re heading into the desert. It’s hot, dry, and the distances between towns are long. The main draw is Uluru (Ayers Rock), Kata Tjuta, and Kings Canyon. You can do this as a 3-day tour from Alice Springs or a self-drive over a week. Best for: travellers who want a cultural and geological experience, are comfortable with extreme heat, and have a shorter timeframe.
If you only have two to three weeks, choose one route. The East Coast is the most efficient. If you have a month, you could do the East Coast and a quick detour to Uluru. If you have three months or more, you can combine the East Coast with the West Coast or do a full loop of the country.
The Classic East Coast Route: Sydney to Cairns
This is the route almost every solo backpacking Australia guide will point you toward, and for good reason. It’s efficient, well-trodden, and packed with highlights. Most people start in Sydney, head north through Byron Bay, Surfers Paradise, Fraser Island (K’gari), the Whitsundays, Magnetic Island, and finally Cairns. You can also do it in reverse.
Transport is straightforward. Greyhound Australia offers a hop-on-hop-off bus pass that lets you travel between towns on a flexible schedule. It’s not glamorous, but it’s reliable and social. Budget airlines like Jetstar and Tigerair can save time on longer legs, like Sydney to Brisbane or Brisbane to Cairns, but factor in baggage fees and airport transfers.
Key stops worth your time:
Byron Bay: More than just a party town. The lighthouse walk and the beach are genuinely stunning. Hostels here are notoriously social. Book ahead in peak season.
Fraser Island (K’gari): A 4WD-only sand island. Join a tag-along tour where you drive with a group. It’s a few days of camping, swimming in freshwater lakes, and avoiding dingoes. Worth every cent.
Whitsundays: Sailing is the main activity here. You can book a 2-day or 3-day sailing tour that includes Whitehaven Beach and snorkelling. It’s expensive but memorable. Budget options exist if you book last minute or go in the off-season.
Cairns: The gateway to the Great Barrier Reef and the Daintree Rainforest. You can book day trips to the reef or longer liveaboard diving trips. The hostel scene here is huge, with plenty of jobs for working holiday makers.
A common beginner mistake is trying to do too much. If you only have three weeks, don’t try to do the entire 1,500 km route at a rushed pace. Pick a section: Sydney to Brisbane or Cairns to the Whitsundays. You’ll enjoy it more than spending half your time on a bus.
Western Australia: The Perth to Broome Adventure
The West Coast is a different beast. It’s less developed, less crowded, and requires more self-sufficiency. The main route runs from Perth up to Broome, a distance of about 2,400 km. There are no direct buses along the full route. You have two realistic options: rent a campervan or join an organised tour.
Group tours like those run by Adventure Tours Australia or Autopia cover the route in 10 to 14 days. They include accommodation, meals, and a guide. It’s not the cheapest way to travel, but it solves the logistics problem and you’ll be with other solo travellers. If you’re on a tighter budget, buying a cheap used car or campervan in Perth and selling it in Broome is a common backpacker move. Facebook groups and hostel noticeboards are full of these deals.
Key stops worth prioritising:
Ningaloo Reef: This is the big draw. Unlike the Great Barrier Reef, you can swim from the beach here. Snorkelling with whale sharks (March to July) and manta rays is a bucket-list experience. The town of Exmouth is the hub.
Karijini National Park: A stunning series of gorges and waterholes. You can swim in cool, crystal-clear pools between red rock walls. It’s a highlight of the West Coast and worth a multi-day stop.
Coral Bay: A small coastal town with incredible snorkelling right off the beach. It’s quieter than Exmouth and a good place to relax for a day or two.
Broome: The end of the road. Cable Beach is famous for sunset camel rides, but the town itself has a laid-back, pearling-era charm.
The West Coast is best done during the dry season (April to October). Summer temperatures are extreme, especially in the north, and many roads can be impassable during the wet season (November to March). Be prepared for long driving days and limited mobile phone reception outside of towns.
The Red Centre Outback Route: Alice Springs to Uluru
This is a shorter, more focused route that delivers a genuinely unique Australian experience. The Red Centre is not about beaches or nightlife. It’s about vast open spaces, ancient rock formations, and Aboriginal culture. Most people fly into Alice Springs and then join a tour or rent a car to drive the 450 km to Uluru.
The key attractions are:
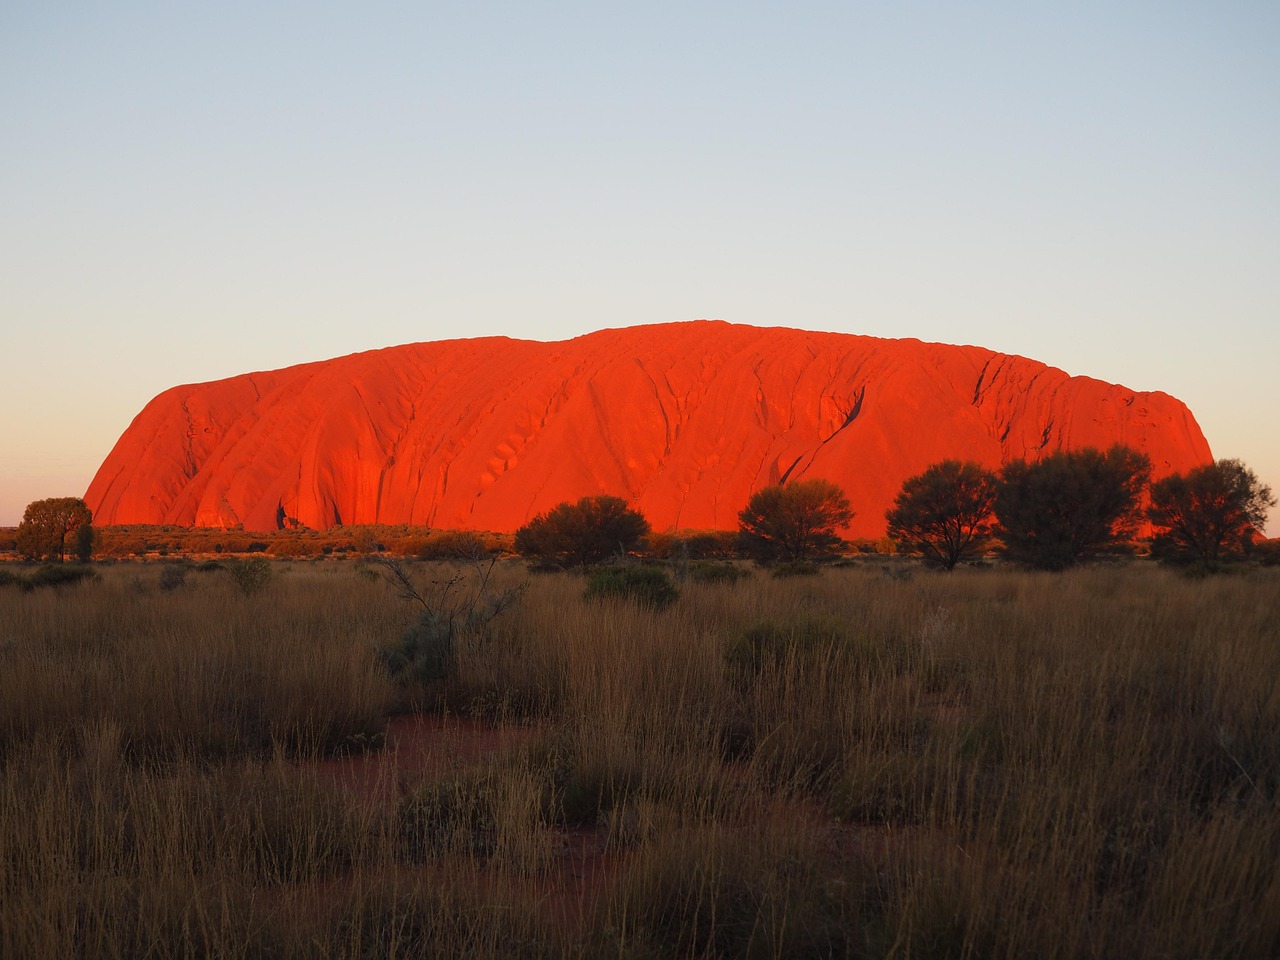
Uluru (Ayers Rock): The iconic monolith. You can walk the base (10 km) or take a guided tour that explains its cultural significance. Climbing is closed out of respect for traditional owners. The sunrise and sunset light shows are spectacular.
Kata Tjuta (The Olgas): A group of large domed rock formations about 50 km from Uluru. The Valley of the Winds walk is the highlight, a 7 km loop through the domes.
Kings Canyon: A massive canyon with a 6 km rim walk. It’s a strenuous hike in the heat, but the views are incredible. It’s about 300 km from Uluru.
Transport options: The most common way to see the Red Centre is via a 3-day or 4-day tour from Alice Springs. These include all accommodation (usually camping), meals, and a guide. Companies like AAT Kings, The Rock Tour, and Mulga’s are well-regarded. If you prefer self-driving, you can rent a car in Alice Springs and book accommodation in advance at Yulara (the resort town near Uluru) or Kings Canyon. Be aware that fuel, water, and food are expensive in remote areas, so stock up in Alice Springs.
Preparation is critical here. The heat is relentless, especially from October to March. Bring a wide-brimmed hat, a reusable water bottle (minimum 4 litres per day), and high-SPF sunscreen. Mobile reception is sporadic. Download offline maps on your phone before you leave. Book accommodation well in advance, especially during school holidays and summer.
Planning Your Itinerary: How Long Should You Spend Backpacking Australia?
The answer depends entirely on your route and your travel style. The common mistake is trying to do too much in too little time. Australia is vast. Driving from Sydney to Cairns alone takes around 24 hours of non-stop driving. Stretching that over a few weeks with stops works, but you’ll spend a lot of time on buses.
2 weeks: This is enough for one focused region. A Sydney-to-Byron-Bay or Melbourne-to-Adelaide run is realistic. You can also do a single route like the Red Centre or a concentrated section of the East Coast (e.g., Cairns to the Whitsundays). You won’t see the whole country, but you’ll have a quality experience.
1 month: This is the sweet spot for the East Coast highlights. You can do Sydney to Cairns at a comfortable pace with days for key stops like Byron Bay, Fraser Island, the Whitsundays, and Cairns. You’ll have time for a few rest days and won’t feel rushed.
3 months or more: This opens up the West Coast, the Outback, and allows for a full loop. You can do the East Coast, then fly to Alice Springs for the Red Centre, then fly to Perth and drive to Broome. Or you can buy a used car and do a full circumnavigation. This is the ideal timeframe for anyone on a working holiday visa, as you can also work for a few weeks to replenish funds.
A good rule of thumb: for every 100 km you plan to travel, budget at least one full day for travel, including waiting for buses, checking in, and recovering. This prevents burnout and leaves room for spontaneity, which is part of the backpacker experience.
Working Holiday Visa: The Solo Backpacker’s Hack for Staying Longer
The Working Holiday Visa (subclass 417 or 462 depending on your country) is probably the best-kept secret for solo backpackers. It allows citizens of eligible countries (UK, USA, Canada, Germany, France, Japan, many others) aged 18 to 30 (35 for some nationalities) to live and work in Australia for up to 12 months. You can extend it for a second and third year if you do specified work in regional areas.
The application process is straightforward and can be done online. There’s a fee (around AUD$500), but you don’t need a job lined up. You arrive, and you can start working immediately for any employer, though limited to 6 months with one employer. This is the hack: you can fund your entire trip by working part-time or full-time for a few months at the start or during your travels.
Typical jobs for backpackers include:
Hospitality: Bars, cafes, pubs in cities and coastal towns. Melbourne, Sydney, and Cairns have huge demand.
Farm work: Fruit picking, packing, or farm labour in rural areas. This is also the way to secure a second-year visa.
Construction: Labouring jobs for those who don’t mind physical work.
Hostel work: Reception or cleaning in exchange for free accommodation (not always paid, but reduces costs).
Pros: You can stretch your budget significantly. You can afford nicer hostels, more tours, and longer stays. You also gain local experience and make friends outside the backpacker bubble.
Cons: You have to pay tax. The tax-free threshold is low for non-residents. You also need to plan around your visa conditions, including the 6-month work limit. And you might get stuck in a job you dislike for a few months.
If you’re between 18 and 30 (or 35 if eligible) and you have even a slight interest in staying longer, apply for the visa before you arrive. It’s cheaper and easier than trying to do it after you land.
Budgeting for a Solo Backpacking Australia Trip
Australia is not a budget destination. If you’re coming from Southeast Asia or South America, the price shock is real. However, with careful planning, you can keep costs manageable. A realistic daily budget for frugal solo travel is $100 to $150 AUD per day. This covers accommodation, food, transport, and one activity every few days. If you want to do a lot of tours or eat out every night, double that.
Here is a rough daily breakdown for the East Coast:
Accommodation: $30–50 AUD for a dorm bed in a decent hostel. Private rooms are $80–150 AUD.
Food: $10–15 AUD for breakfast and lunch from a supermarket. $15–25 AUD for a hostel-cooked dinner. Eating out costs $30+ per meal.
Transport: $20–40 AUD average per day, depending on the distance. Greyhound passes work out cheaper than individual tickets. Budget flights can be as low as $50–100 AUD for long hops.
Activities: $0–100 AUD depending on what you do. Free: beaches, city walks, national park entry (many are free). Paid: reef trips ($150–250 AUD), Fraser Island tours ($400+ AUD), skydiving ($300+ AUD).
Ways to save money:
Cook your own meals: Hostels have fully equipped kitchens. This is the single biggest money saver. Buy staples from Coles or Woolworths, not convenience stores.
Use budget airlines: Jetstar and Tigerair fly between major cities. Book in advance and pack light (7 kg carry-on only) to avoid fees.
Book tours in groups: Many tour operators give discounts for booking with a group of 4+ people. Check hostel noticeboards or ask at reception for shared bookings.
Get a travel credit card: Avoid forex fees. Cards like the Wise debit card or Revolut work well. Withdraw cash from ATMs at major banks to avoid high fees.
Use hostel loyalty programs: YHA Australia has a membership card that gives you 10% off accommodation and some tours.
A 1-month trip on the East Coast will cost around $3,000–4,500 AUD, excluding international flights and travel insurance. Budget for an extra $1,000 for incidental costs like flights between cities or a last-minute tour upgrade.
Where to Stay: From Hostels to Campervans
Your accommodation choice directly affects your experience as a solo backpacker. Most people stay in hostels, and the quality varies. The YHA chain is generally reliable: clean, safe, and with good facilities. Independent hostels can be more characterful but check recent reviews for cleanliness and management. Websites like Hostelworld and Booking.com are your best friends, but booking direct often saves you a small commission.
Social hostels: If you want to meet people, choose hostels with common areas, a bar, or organised events. Look for places with a ‘party hostel’ reputation if that’s your vibe, or ‘social but not crazy’ types like a YHA with a rooftop terrace. Examples include Base Hostels (Sydney, Byron Bay, Melbourne) and Nomads (Cairns, Airlie Beach).
Quiet hostels: If you need sleep or are working, look for smaller hostels away from main backpacker strips. These often have a more relaxed atmosphere and longer-term residents. Check photos and reviews for noise levels.
Campervan hire: This is an alternative route for the West Coast or a full lap. Companies like Travellers Autobarn, Apollo, and Britz rent out campervans and 4WD vehicles. You can pick up in Sydney, Melbourne, or Perth and drop off in another city. It’s not cheap (expect $100–200 AUD per day for a basic van), but it replaces both accommodation and some transport costs. You can also buy a used van and sell it at the end, which can be cheaper if you know what you’re doing.
Couchsurfing: Still active in Australia, especially in cities. It’s free, but you need to plan ahead and be comfortable with staying in someone’s home. Great for local tips but less reliable than hostels.
Bookings: During peak season (December to February, plus school holidays in April, July, October), book dorm beds at least a week in advance for popular spots like Byron Bay, Airlie Beach, and Cairns. Off-season, you can often just show up.
Packing Essentials for the Solo Backpacker in Australia
Packing light is critical in Australia because you will move often. A 40-50 litre backpack is ideal. Avoid a suitcase unless you’re fine dragging it across hostel laundry rooms. Here’s what you actually need, based on route:
For the East Coast:
– A good daypack (20-25 litres) for beach days and short hikes.
– Reusable water bottle (1 litre minimum). Refill at hostel kitchens.
– Travel towel (quick-dry microfiber). Hostels rarely provide them. Solo travellers often find a microfiber travel towel indispensable for quick-drying between stops.
– Flip-flops (thongs) for hostel showers and beach.
– One pair of comfortable walking shoes or trail runners.
– Lightweight clothing: shorts, t-shirts, one pair of jeans, a light jacket for evenings.
– Universal adapter (Australia uses Type I plugs).
For the West Coast and Outback:
– Wide-brimmed hat (not a baseball cap—proper sun protection).
– Sunscreen (SPF 50+). Buy in Australia, it’s regulated and effective.
– Sunglasses (polarized, good quality).
– Power bank for phone (offline maps drain battery).
– Mosquito repellent (DEET-based for remote areas).
– A lightweight long-sleeve shirt for sun and insects.
– Sleeping bag liner (useful for hostels with questionable laundry or for camping).
Do not pack bulky items like multiple pairs of jeans, a heavy coat (unless you are doing winter in Tasmania), or a full-sized towel. You can buy anything you forget in Australia, but it will be more expensive than bringing it from home. Think of your backpack as a tool, not a closet.

Staying Safe and Connected: Practical Tips for Solo Travelers
Australia is generally safe for solo travellers, but you need to be smart. The main risks are sun exposure, dehydration, and minor theft, not violent crime. Here’s practical advice:
Safety in hostels: Use locker facilities. Most hostels have lockers, but you may need your own padlock. Keep your passport, cash, and electronics locked away. Don’t leave your phone or wallet on a hostel common room table while you go to the bathroom. It’s not paranoia; it’s common sense.
Staying connected: Get a local SIM card at the airport or from a major provider (Telstra, Optus, Vodafone). Prepaid plans are cheap (around $30 AUD for 30GB data). Telstra has the best coverage in remote areas. If you’re going to the Outback or West Coast, download offline maps on Google Maps or Maps.me before you lose signal. Let someone at home know your general itinerary and check in every few days. For frequent use, a reliable portable power bank can keep your phone charged during long travel days.
Outdoor safety: The sun here is intense. Reapply sunscreen every two hours, even on cloudy days. Swim only between the red and yellow flags on patrolled beaches. Riptides are real and dangerous. In the bush, stay on marked trails. Never approach or feed wild animals, including kangaroos, cassowaries, or dingoes. They are not pets.
Emergency numbers: Dial 000 for police, fire, or ambulance. This is free from any phone, even without credit.
Common Mistakes Solo Backpackers Make in Australia (And How to Avoid Them)
Based on what I’ve seen over the years, these are the most frequent errors, along with how to avoid them:
1. Overpacking. You will buy stuff here. You will accumulate souvenirs. Packing a 70-litre pack with jeans and a winter coat for a tropical destination is a waste of energy and money. Stick to layers. You can always buy a cheap jacket if needed.
2. Underestimating distances. The map looks small. Sydney to Cairns is an 11-hour flight. Driving from Perth to Sydney takes 4 days straight. Don’t plan to see it all in two weeks. Pick one region and do it well.
3. Booking too rigidly. It’s good to have a loose plan, but booking every single hostel and bus six months in advance kills your flexibility. You might meet people who change your plans. Keep a few nights open for spontaneous detours.
4. Ignoring sun safety. Sunburn is painful and increases your risk of skin cancer. Australians take sun protection seriously for a reason. Wear sunscreen, a hat, and sunglasses every day, even when it’s cloudy. A wide-brim UPF 50 hat offers much better protection than a baseball cap.
5. Not getting a local SIM card. International roaming is expensive and unreliable. A local prepaid SIM solves that. You also need local data for maps, booking WhatsApp messages, and staying in touch with hostel groups. Do it on day one.
Final Thoughts: Start Planning Your Solo Adventure
Solo backpacking in Australia is one of the best decisions you can make. The country is built for it. The routes are well-defined, the people are welcoming, and the experiences range from world-class beaches to ancient desert landscapes. The key is to pick a route that matches your timeframe and budget, then commit to it. You don’t need to see everything. You need to see what you’ve planned, and enjoy it.
Start by deciding which route suits you most. If you’re looking for a social, well-connected experience, the East Coast is your best bet. If you want solitude and raw nature, go west. If you have a short time and want to see something truly iconic, head to the Red Centre. Once you’ve chosen, book your first two nights of accommodation, get your visa sorted, and buy your flight. The rest will sort itself out on the road.

If you have questions about a specific route or stage of planning, drop a comment below. Everyone starts somewhere, and the only real mistake is not starting at all.